So let’s say that you’ve read my article on building your first game, and with the skills you’ve learned, you’ve decided to start working on a platformer. So let’s start with something nice and simple, the most fundamental of platforming design choices: movement.
Don’t Just Stand There
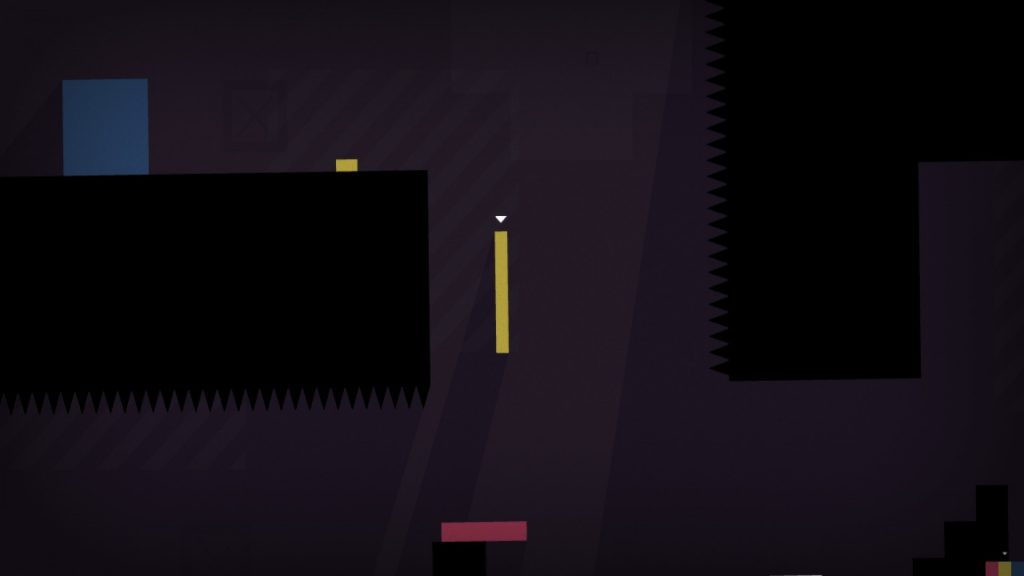
Movement seems obvious: make a thing move and make it feel smooth. How to do it, though, can make or break a project. It’s the job of the programmer to make the player feel in complete control, which is great and all, but it doesn’t always feel exactly smooth. Complete control itself (e.g.: a one-to-one control of your mouse pointer and the platforming character) can lack momentum and feel pretty unnatural. For example, Thomas Was Alone has fantastic physics. It’s phenomenal how every character has physics that relate to them. Their size and shape—even their color—help to depict each character’s movement and abilities. It’s accomplishment is based on the animations. In other words, if the animation isn’t smooth or doesn’t make sense, then the movement isn’t going to feel right.

Thomas not being alone in Thomas Was Alone
So step one to perfecting movement is to perfect the animation. That means step two is testing. You want a few testers of various skill levels. Depending on how accessible you want your game, you’ll want everyone from absolute beginners to the hardest of hardcore. Though not strictly necessary to have such a wide spread of skill levels, it will ensure that movement happens at a comfortable pace for every player. It should go without saying, but you should test regularly to avoid as many glitches as possible. A different player from yourself will most certainly approach a challenge differently from you, be they beginner or expert.
Control Yourself
Speaking of accessibility, probably the most important feature some developers neglect is the ability to change your button configuration. It doesn’t seem like much, but let’s say that your user is used to something else or that they have a disability such as hemiparesis. Letting your player choose a config that’s comfortable for them goes a long way toward playability. Keep that in mind when you’re planning controls.
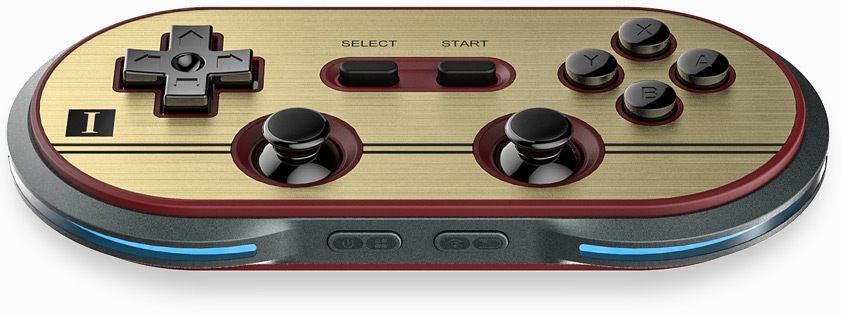
Planning your controls can mean anything from how you character moves to how many abilities your character can use at any given time. We’ve already explored the former more or less, so let’s look at the latter. Modern platformers generally use one of two different styles depending on what the developer is trying to emulate. You’re either attempting to recreate a retro style by planning your controls around the limitations of an older system, or you’re going ultra modern and putting a different command on every button. For simplicity, we’ll refer to these styles as 2-Button and All-Button.

A 2-Button style refers directly to the NES/Famicom controller style, where Button A is jump and Button B is attack or action. In theory, you could look at it in terms of Assassin’s Creed, where Button A makes use of your legs and Button B makes use of your arms. This is not strictly the case, but it’s a good guideline for a standard scheme. A 2-Button style is highly conducive to button combinations with the directional pad, such as Mega Man’s slide and Castlevania’s sub-weapons.
Comparatively, an All-Button style allows for far more options. Axiom Verge did this well, although the experimental UI made for some tough button combinations. All-Button is nice, provided that you allow for button reassignment. The problem, however, is that using and All-Button style is intimidating for entry level players and could make the game unplayable for disabled players.
You’ll probably be limited to a configuration style by how much character animation you’re willing to do. Start with what makes the most sense and remember that you don’t need to use every button for something unique. Players should always be able to rearrange their config. Some of the best and most memorable games ever have had simple control schemes, albeit due to limitations.
On The Level
Let’s talk about level design now. There are three main aspects of good design: Spacing, Pacing, and Facing. Spacing refers to the space between obstacles as it relates to character and enemy movement. Likewise, Pacing refers to the length of the level as it relates to Spacing; in other words, your pacing is reliant on how quickly a player can clear obstacles. Facing is all about how things are positioned in relation to your movement. If you’re moving from left to right and approach a static obstacle—a wall of spikes for example—the collision detection for those spikes needs to be on the left side and they need to be pointing toward you.

Source: megaman.capcom.com
One of my favorite examples of level design is Grenade Man’s stage from Mega Man 8. Despite its highly stigmatic reputation, Mega Man 8 is a fantastic learning tool because it combines old school standards with more modern experimental practices. Grenade Man’s stage in particular has elements of good and bad right next to each other. The level starts as most Mega Man levels do: on a flat, non-threatening platform. You move right and encounter a simple enemy, a worm that spawns from the ceiling. The Mega Man team uses this setup to ensure that any level could be used as an entry point. In the case of Mega Man 8 in general, three out of the four entry stages use this layout very well, not including the actual intro stage (but I’ll talk about that in a bit). A harmless platform, with a simple obstacle just off screen.
Moving through the stage, we’re introduced to some more threatening enemies and some simple elements to expect throughout the level. There are two kinds of cannon enemy: a terrain mounted turret and a hovering turret. Our reoccurring stage element is exploding platforms. These platforms explode in a chain reaction if they take too much damage from your buster. The next thing you see is also the first instance that enemy placement is used to great extent. There’s an enemy trapped between some exploding platforms, which in the case of this particular enemy is fantastic design.
Let’s say you decided to blow up every platform you saw. The location of this enemy can teach you four things about itself. First, it will not go over the edge of a platform, much like a red koopa from Mario. Second, if you shoot it with your buster, the shots will ricochet off. Third, even though the shots ricochet off, the enemy will freeze in place for a few seconds. Fourth, if Mega Man is at the same elevation as this enemy, it will speed up.
The next new element you’re introduced to is that differently colored platforms will not chain together. Which is great, because if you keep shooting, you’ll be introduced to the most hated enemy of Mega Man games: thing-jumping-out-of-a-bottomless-pit. The thing about these differently colored platforms however, is that they’re not used to great effect past this point. After this challenge section is a poorly disguised branching path. The top route has spikes hidden behind some of these platforms and spikes on the ceiling but after that they’re replaced with timed bombs. The bottom path does away with them immediately in favor of timed bombs.
After a challenging section with the timed bombs and pit enemies, there’s a mini-boss who’s killed me more times than I’m willing to admit, and once you get through that, you’re rewarded with an upgrade you’ll probably never use—and the second half of the level. I adore this format. It’s a pure upgrade to the checkpoint system of prior Mega Man games. If you get a game over in the second half of any level, you restart in the second half of that level. It really takes the edge off for newer players.
Here we get two new elements: a ladder and swinging hammers. The hammers are tough for a person with poor depth perception like myself, but they’re still on theme and present an interesting new aspect to timed platforming. Defeating the hammers presents you with a curious prize. An item that you cannot reach. This tells you two things about Mega Man 8: You can revisit any level you’ve cleared; and there are weapons that can affect the environment in various ways.
Most of the challenges in this bit feel like an afterthought. There are some timed bombs leading to a healing item that can probably be ignored. There’s a Sniper Joe on some exploding platforms that presents as much challenge as he would if he were on solid ground. Then there’s a Fire-Met that’s intended to teach you about the new platforms you just saw, but you’ll probably destroy him before you see how they work. Which is too bad because the section that immediately follows is all about these platforms. Luckily, you can’t make it through this section without seeing the Fire-Met in action at least once, but it’s still a sloppy and easily rectifiable design choice. All they had to do is put the fuse closer to the Fire-Met’s spawn point.
The last thing you have to do before facing Grenade man is deal with hammers over bottomless pits, as well as some sloppily placed enemies. It almost feels like they weren’t sure how to finish the level so they threw something together that was just annoying enough to probably kill you and make you do the last section over.
I’m Sorry, Your Grenade Man is in Another Castle
It’s not a bad level by any means. It’s just that there are just some sloppy choices that could have been avoided with a little more testing. Every enemy and obstacle is on the theme of ammunition manufacturing—except for the omnipresent cave bats but those can be forgiven. The music fits kind of a mathematical but chaotic tone, and the background is a gigantic gear that brings to mind all the moving parts you would expect to see in a factory. It all fits together well aside from a few small elements.
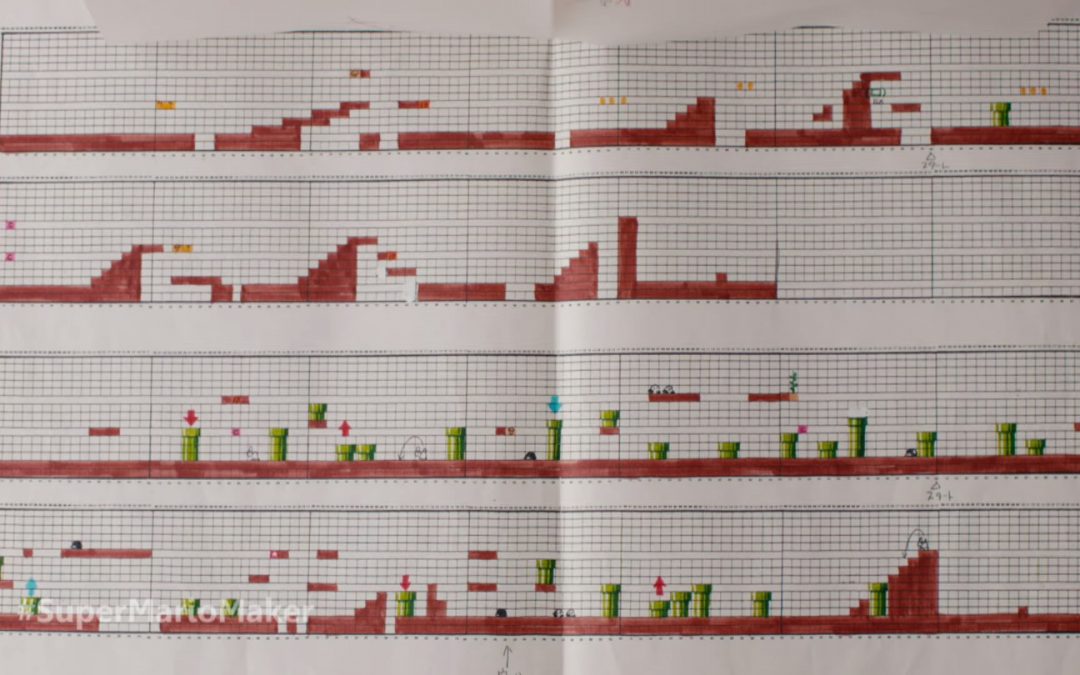
So how do you build a really great level? You build it backwards. Start at the end with the most challenging thing you can build using only parts that are on theme. Then deconstruct it in a way that teaches even the most inept player how the individual mechanics function. If there’s an element that kills you instantly, teach it early but not so early as to push people away. By the time you’re finished taking your challenge apart, you should have a level. This level should start small, introduce an element, explore it’s uses, repeat.
Finishing Touch
When the time comes to wrap it up, you’ll be halfway there. Reevaluate everything. Make sure that your movement is an appropriate speed for the challenges you’ve designed. You’ll want a few fresh pairs of eyes to play so you can see second hand how well the average player is able to react to what you give them. Make doubly sure that your button config is fully customizable. You want everyone from any walk of life to want to play your game. Your ideal button layout may not work for every player. Make sure your challenges don’t have any unreasonable leaps in difficulty. You should build your challenges backwards, making sure that every element is utilized in a way that explains the mechanics you plan to use. Finally, your aesthetic should all match, or make some kind on sense. It’s a lesser point when we’re talking about a platformer, but that doesn’t make it less weird to fight a tiger with a mop while you’re underwater. Unless you’re going for weird. In that case, go nuts, you scuba diving mop tiger.

